Video call module - Calendly setup
Want to let visitors schedule a video call? Link Futy to Calendly and let visitors schedule an Appointment or Video call through the website.
1. Create a Calendly account
2. Link Calendly to Futy
3. Hide the Calendly cookie bar
Watch an explanation video here:
Or follow the steps below:
- 1
-
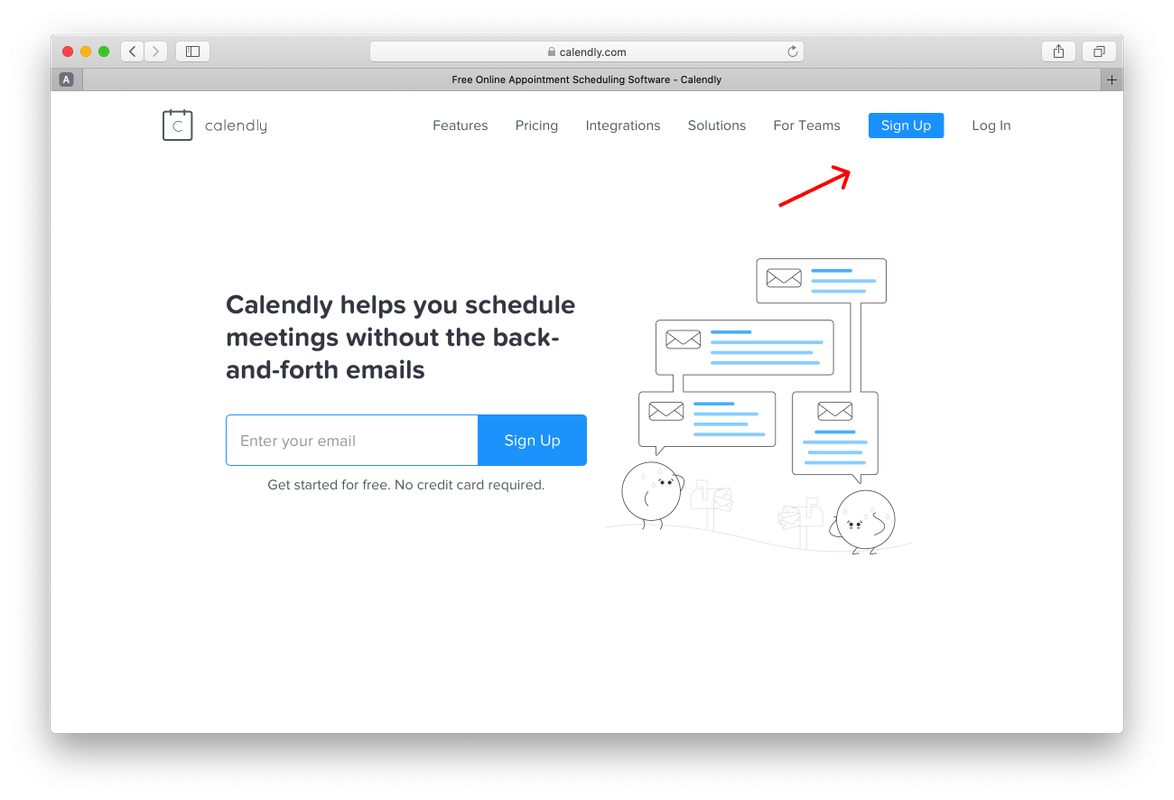
Go to Calendy.com and create an account
Go to www.calendly.com and create an account. The free version of Calendly allows you to link 1 calendar. In principle, this should be sufficient to properly deploy Calendly in the Futy Leadbot.
- 2
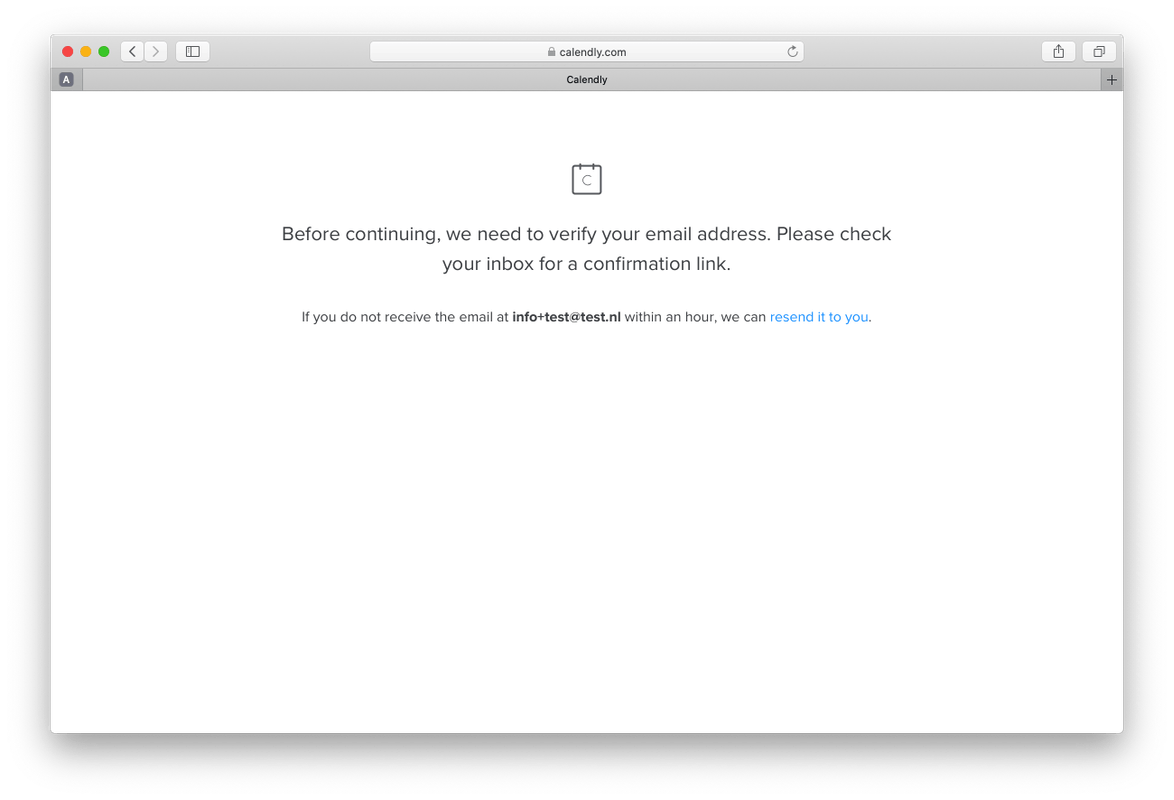
- Verify your email address To proceed, you must first verify your e-mail address. The link in the email will redirect you to the account.
- 3
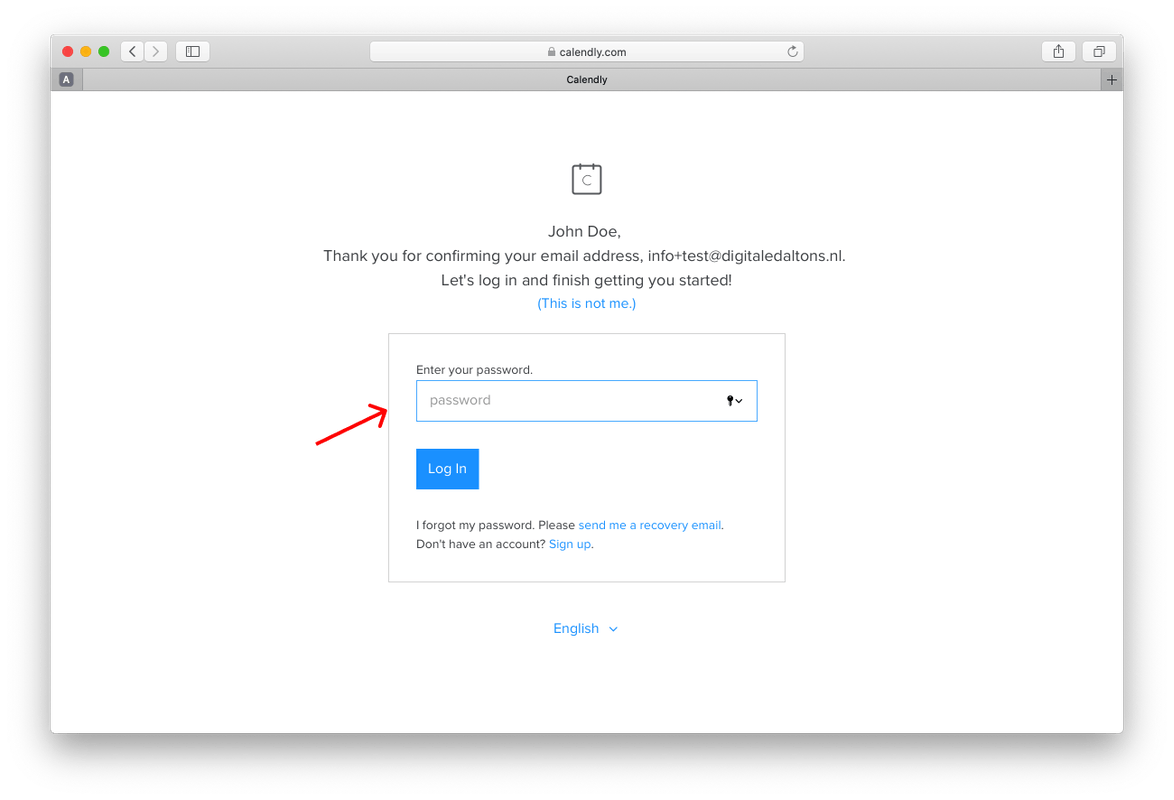
- Set a password
- 4
- Choose a url structure you want to use for your personal Calendly link My advice would be to use your company name.

- 5
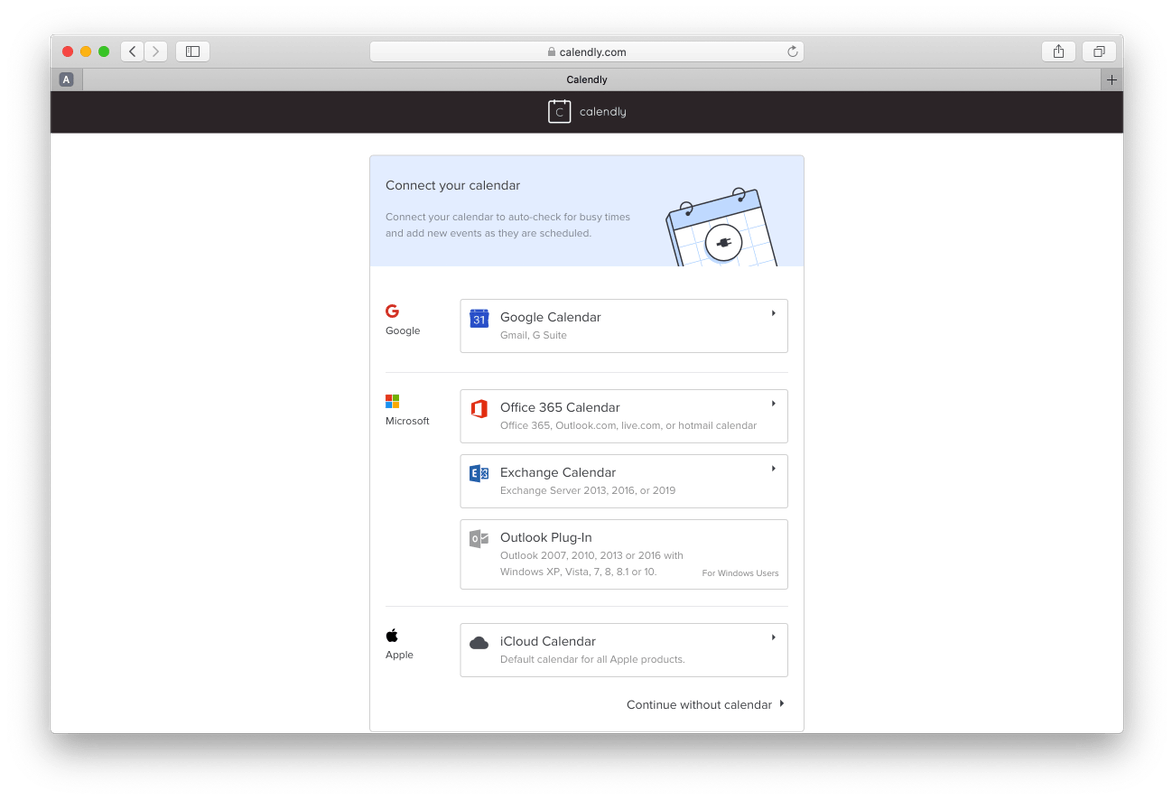
- Link your calendar with Calendly Linking your calendar automatically adds appointments to your calendar. Calendly also sees when you have other appointments in your calendar. This allows you to schedule appointments only when you are available. In the next step you can further set your availability for appointments. You can also continue at the bottom without linking a calendar.
- 6
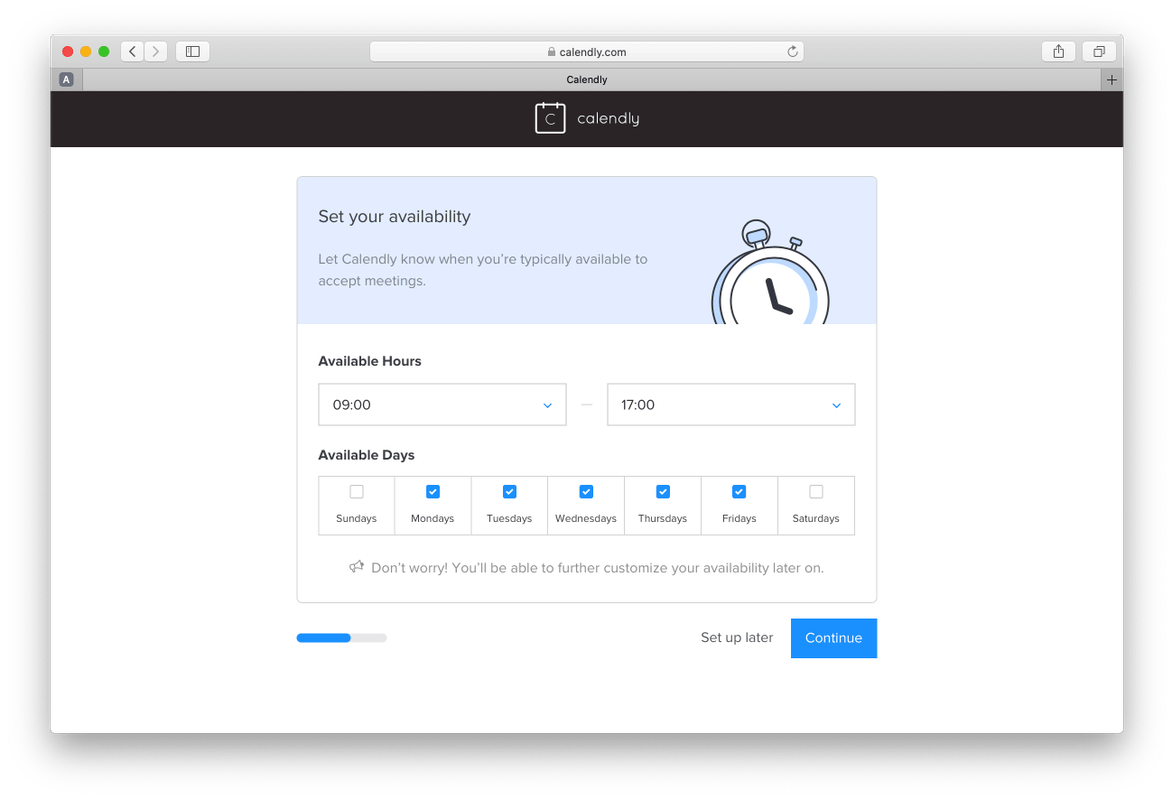
- Set your availability Specify when visitors may schedule an appointment in your calendar. For example, you could say that every day between 2 p.m. and 6 p.m. are your "sales blocks. In these, you can allow visitors to choose a convenient time. If another appointment is already in your calendar, that time is automatically unavailable. This works perfectly! You can also set this for each appointment later.
- 7
- How long do you want the appointment to last? By default, the options displayed are 15, 30 or 60 minutes. You can use one of these times. Or on the right, you can use 'new even type' to create a new appointment option.

- 8
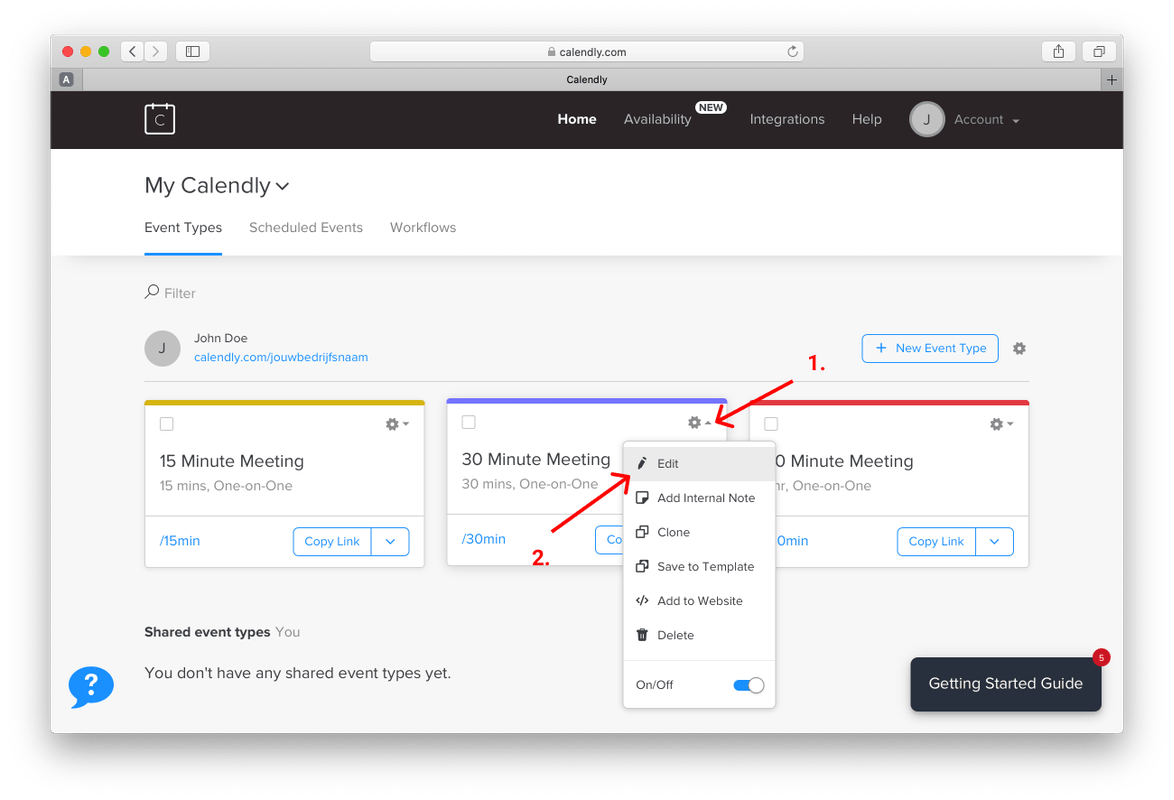
- Edit appointment For convenience, let's take the 30-minute appointment. When you click on the cog icon, you get the option to edit the appointment.
- 9
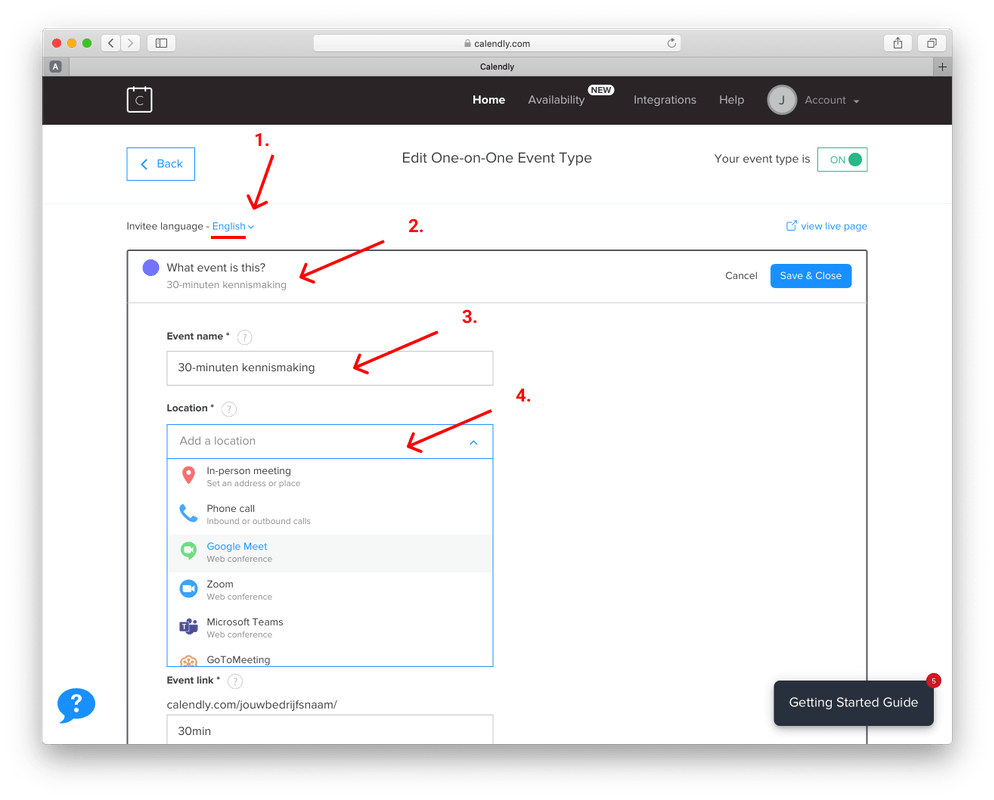
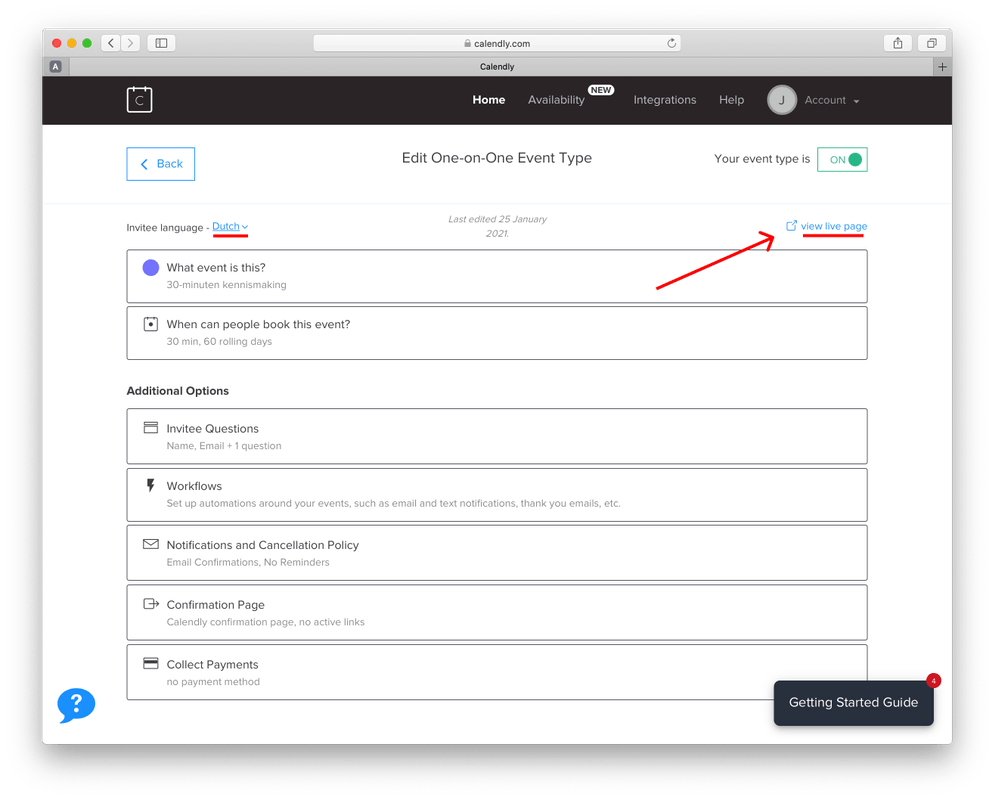
- Select the appropriate language for your appointment Be sure to select the correct language for the appointment. Calendly offers the option to set the appointment in Dutch. This is very convenient, this way your visitor will get a Dutch appointment confirmation.

- 10
- Change the appointment name and location Click on "What event is this? Here you can change the name of the appointment, to '30-minute introduction' for example. For the location, you have several options:
- In-person meeting: this is for physical appointment, here you can possibly enter the address.
- Phone call: here you can enter a phone number to be called.
- Google Meet: this is for a video call, this automatically generates a Google Meet video link for during the appointment.
- Zoom: this is for a video call, this automatically generates a Zoom video link for during the appointment.
- Microsoft Teams: this is for a video call, this automatically generates a Microsoft Teams video link for during the appointment.
- 11
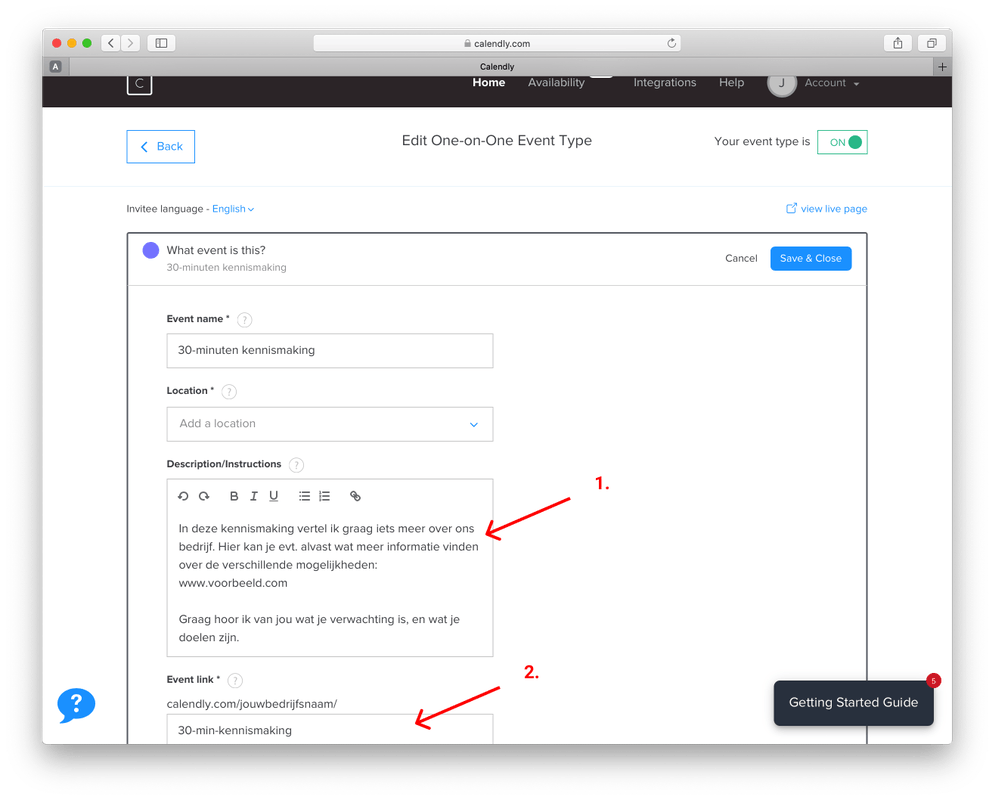
- Add a description and the link to the appointment In the description, put additional information that is useful for the appointment. For example, a link, a task or a brief description of the content of the appointment.
At the bottom, add the last bit for your Calendly url, for this appointment.
- 12
- Set further details for your appointment Check that your availability is set correctly. Set the duration of the appointment. And reserve some extra time in your calendar, if necessary, before or after the appointment.
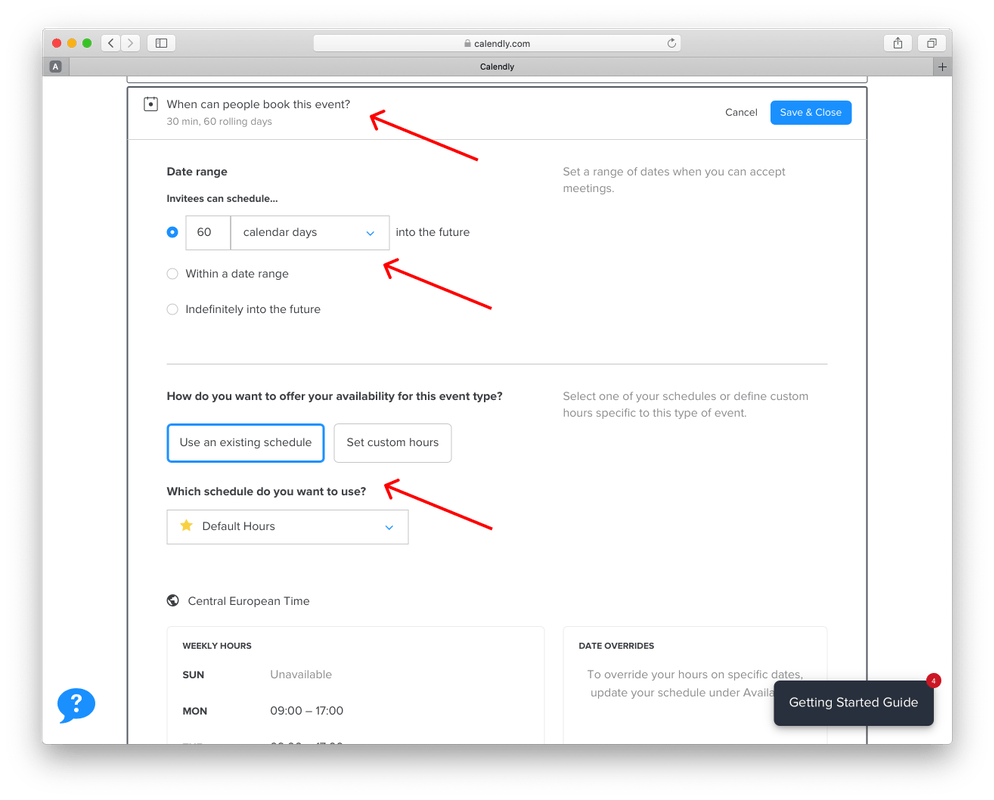
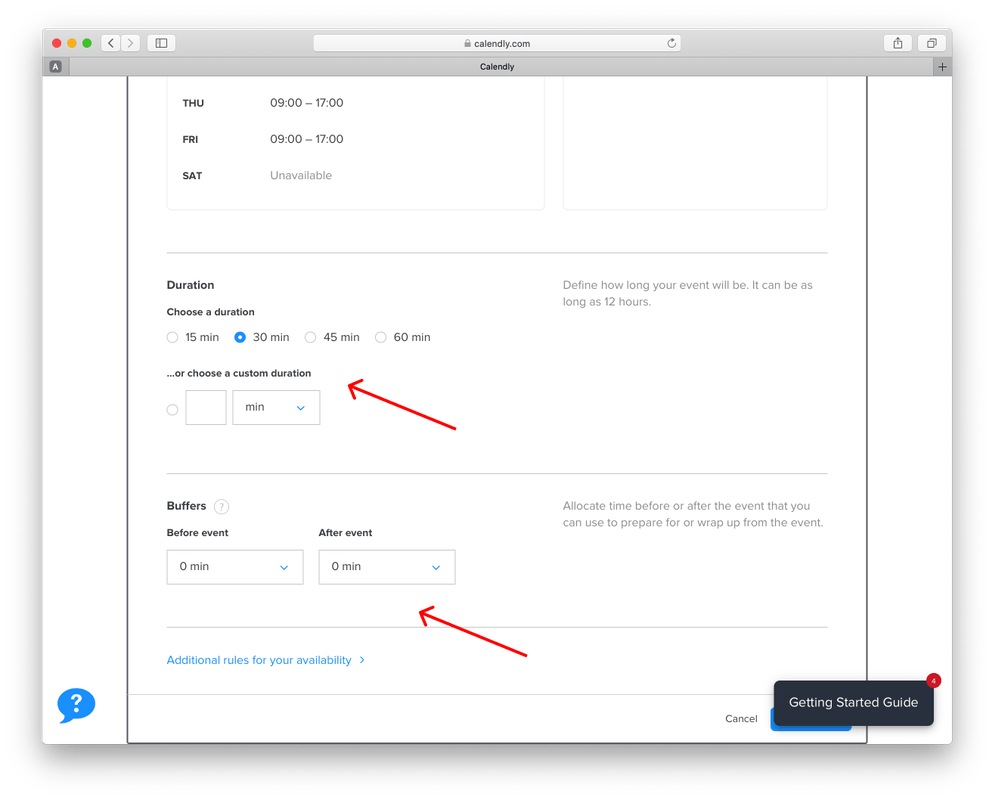
- 13
- Check the appointment confirmation Review the communication regarding the appointment confirmation. If desired, you can change the texts to your own tone of voice. The upper block is about the subject of email. The lower block is about the content of the confirmation e-mail.
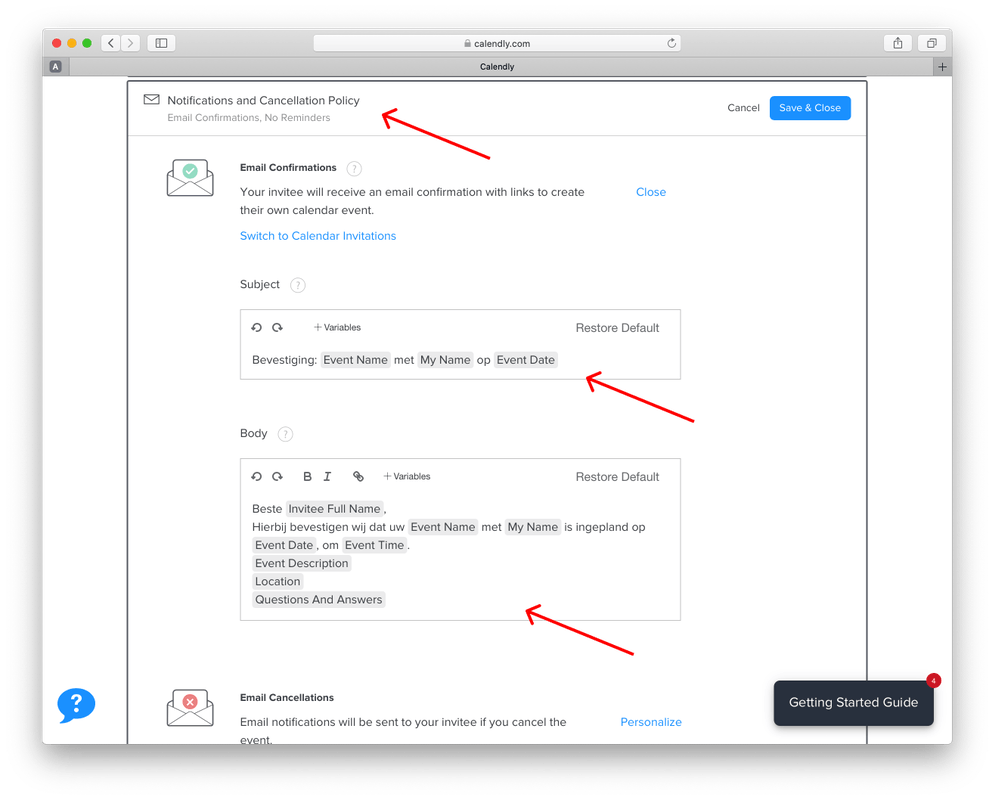
- 14
- Set a redirect if necessary When your visitor has scheduled the appointment, you can choose which page you want to send the visitor to. This can be a thank you page from Calendly. But this can also be a thank you page from your own website (this can be useful for measuring conversions). You can also send the visitor to a page with more information about your company. My advice would be to send the visitor back to your own website.
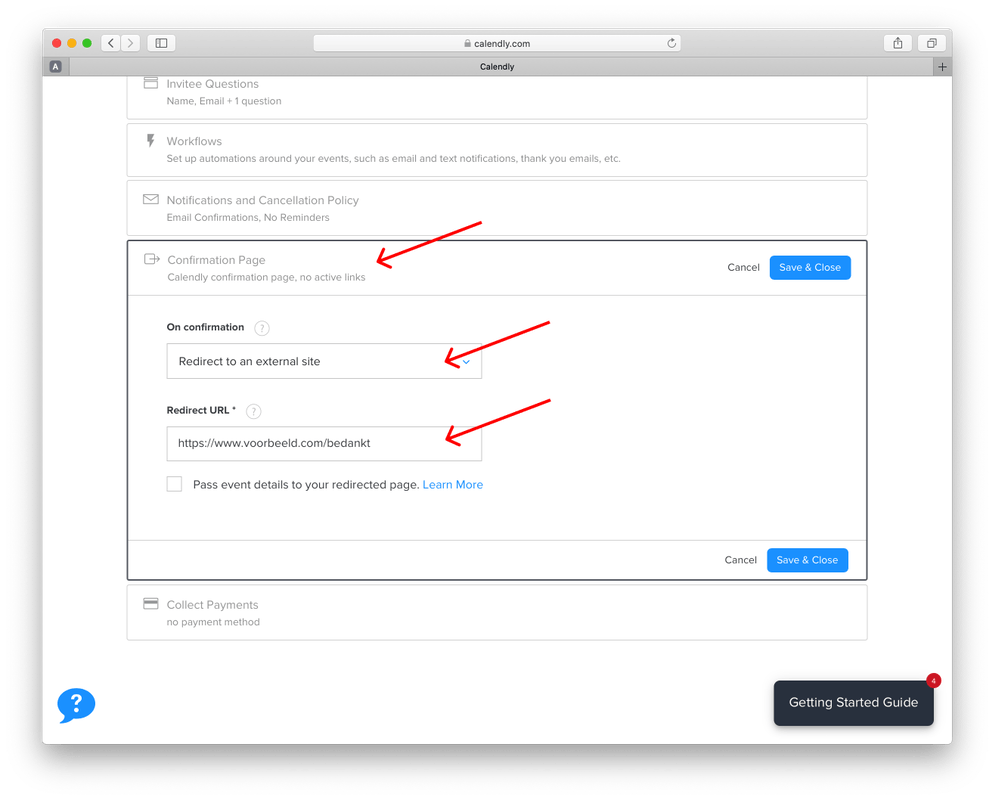
- 15
- Your Calendly videocall appointment is ready to use Click 'view live page' to see your personal appointment page.
- 16
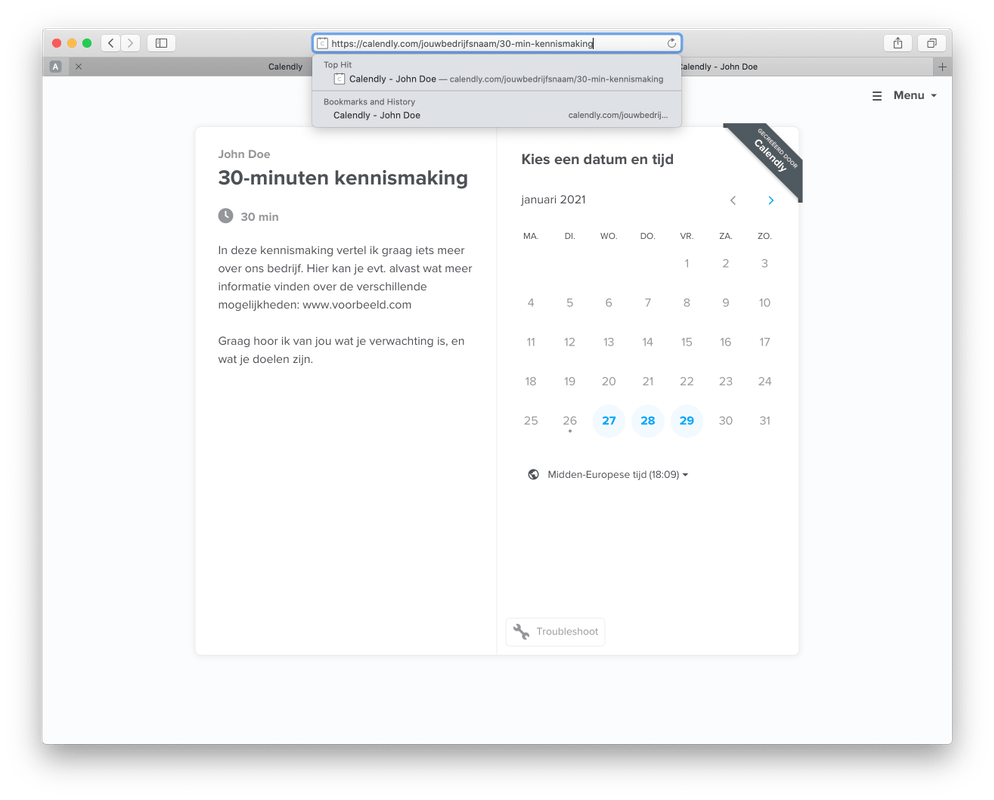
- Personal page from Calendly for a video call or appointment via the website You have now used your own appointment page in Calendly. So on this page, your website visitors can schedule an appointment or video call. You can incorporate this into a redirect button from the Futy Leadbot.
- 17
-
Go to your Futy account
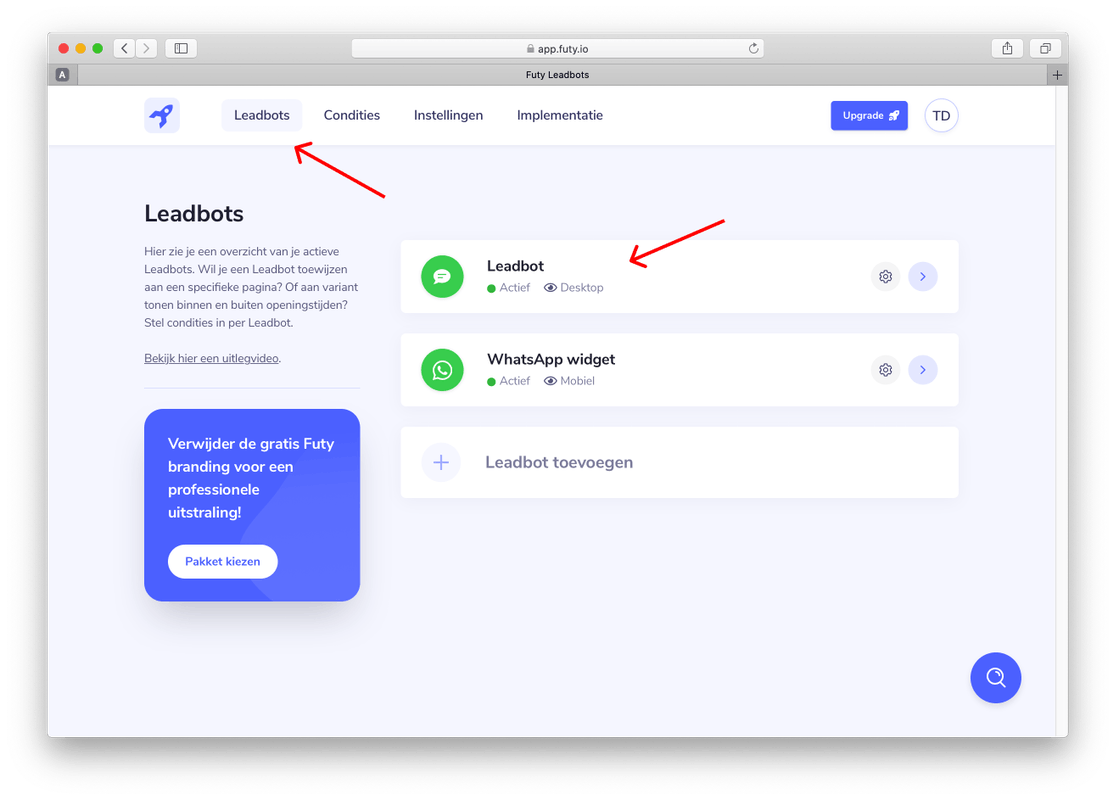
Log in to app.futy.io. Go to the Leadbots page and click on the Leadbot to go to the builder.
- 18
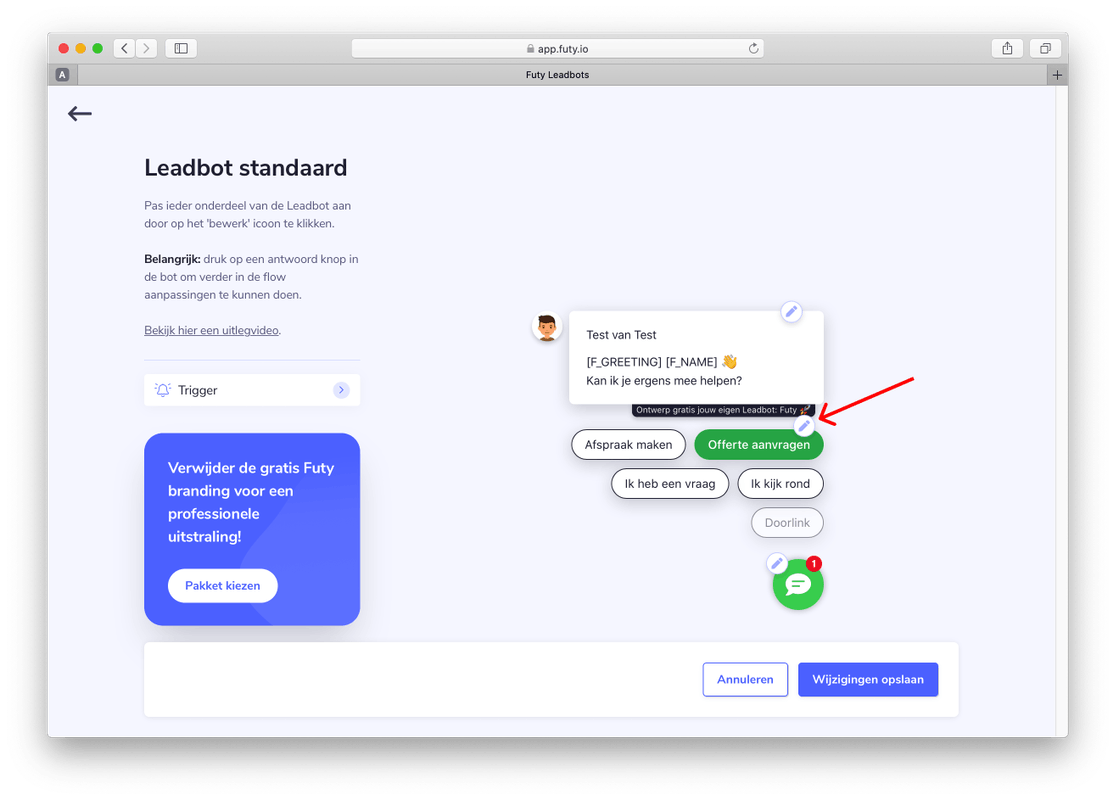
- Click the edit icon to activate the video call or redirect button
- 19
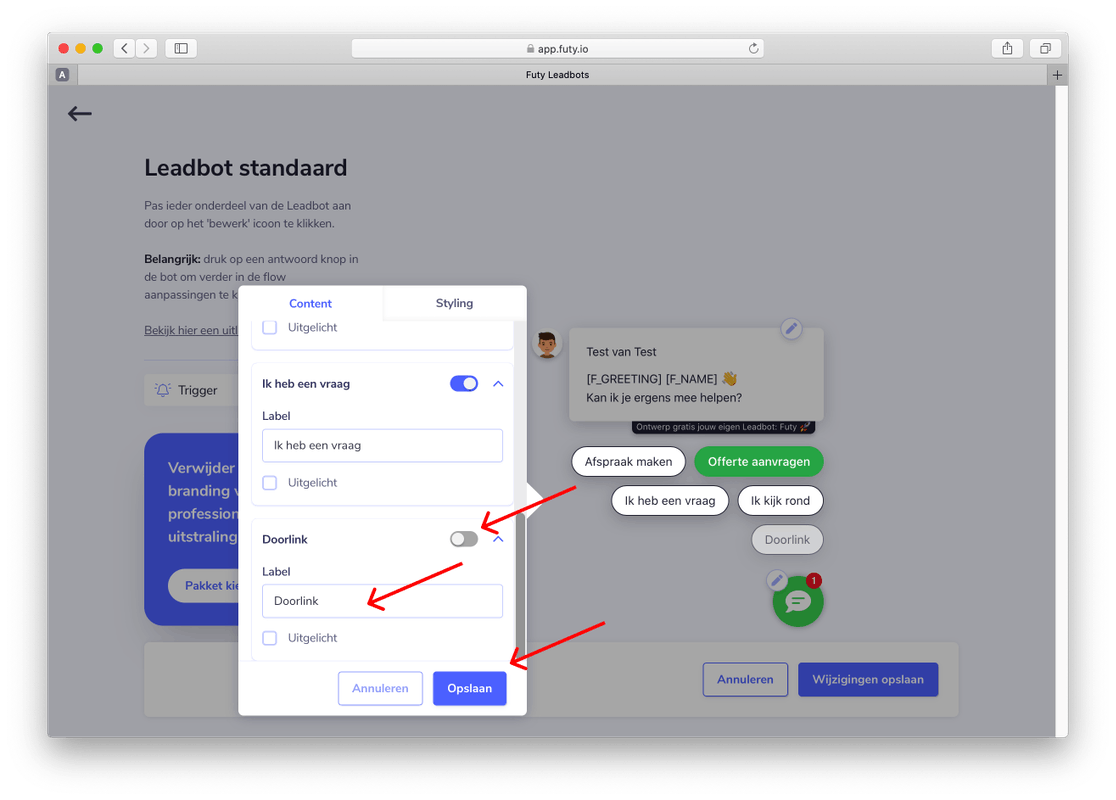
- Turn on the slider of the video call or redirect button Scroll down. Turn on the slider of the video call or redirect button. Customize the name of the button in the label heading. For example, "Schedule video call. (turn off any other button if necessary). And press save.
- 20
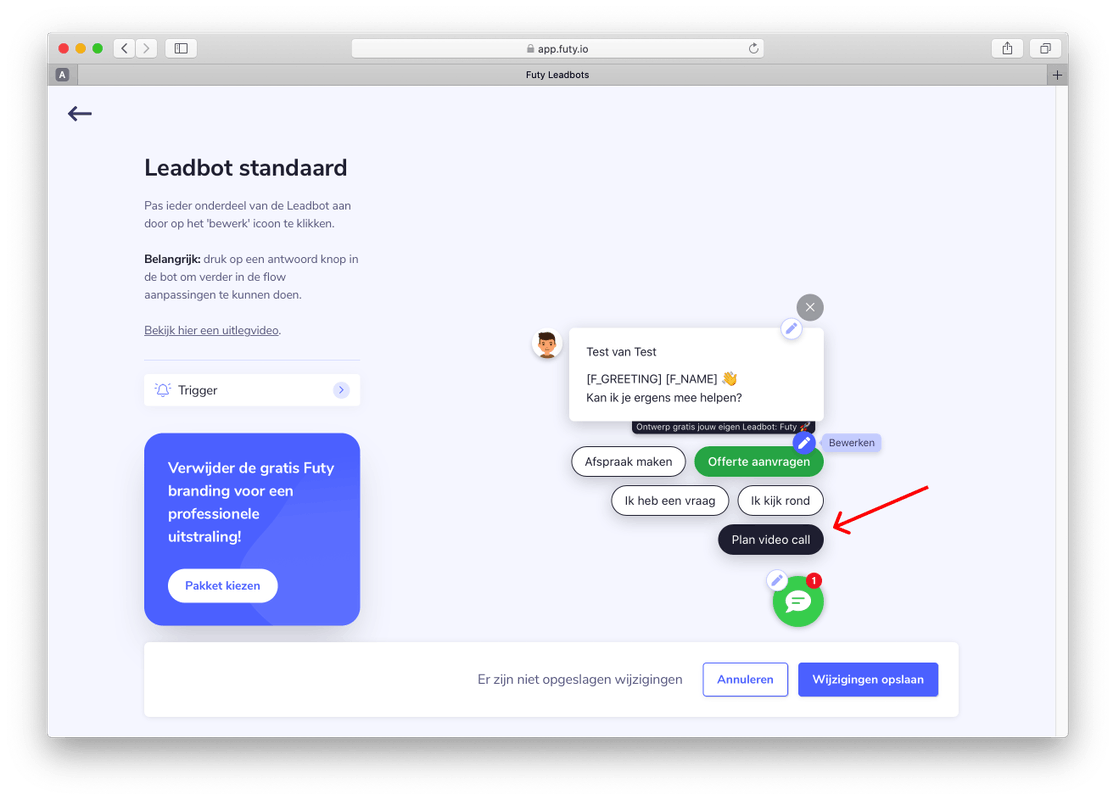
- Press the video call/redirect button to edit deeper into the flow Press "schedule video call" to edit the next step in the flow.
- 21
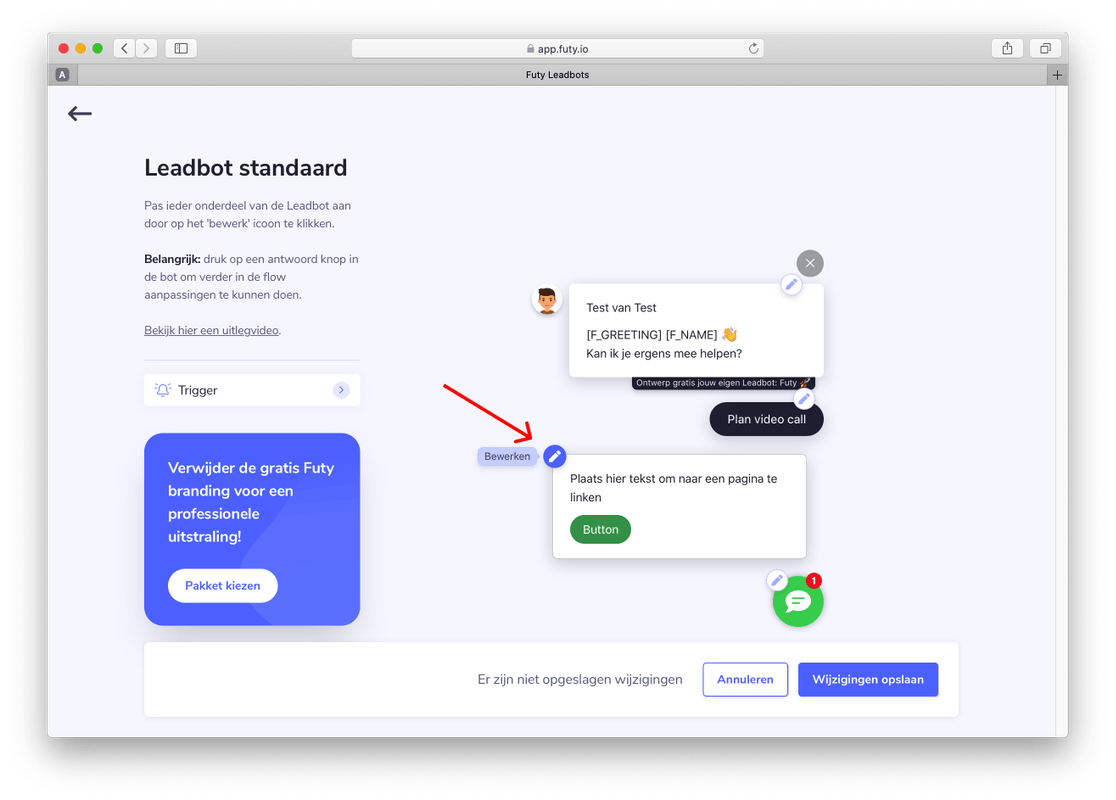
- Press the edit icon to edit the next step
- 22
-
Change the text, button and link
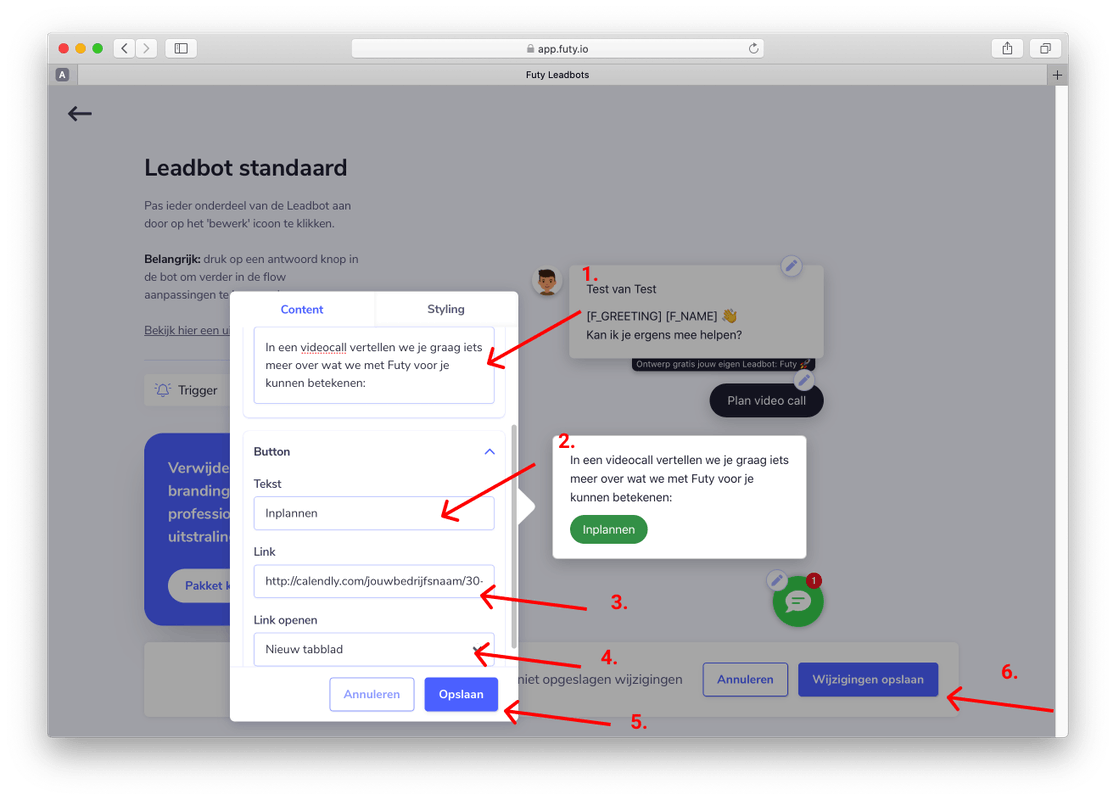
Change the text to provide some additional information. Change the button text visible in the button. Paste the appointment link from Calendly into the link box. These were the final changes. Click save and then click save again. The changes are now in place, Calendly is linked to the Leadbot!
Want to remove the cookie bar from the Calendly pop-up? Then add this to the end of your Calendly url: ?hide_gdpr_banner=1
So your Calendly link will look like this:
https://calendly.com/futy/demo?hide_gdpr_banner=1
The changes have now been made, Calendly is linked to Leadbot! 🎉
